63- أزرار CSS

تعرف على كيفية تنسيق الأزرار باستخدام CSS.
تنسيق الازرار الأساسي

.button {
  background-color: #04AA6D; /* Green */
  border: none;
  color: white;
  padding: 15px 32px;
  text-align: center;
  text-decoration: none;
  display: inline-block;
  font-size: 16px;
}
الوان الازرار

استخدم خاصية لون الخلفية لتغيير لون خلفية الزر:
.button1 {background-color: #04AA6D;} /* Green */
.button2 {background-color: #008CBA;} /* Blue */
.button3 {background-color: #f44336;} /* Red */
.button4 {background-color: #e7e7e7; color: black;} /* Gray */
.button5 {background-color: #555555;} /* Black */
احجام الازرر

استخدم خاصية حجم الخط لتغيير حجم خط الزر:
.button1 {font-size: 10px;}
.button2 {font-size: 12px;}
.button3 {font-size: 16px;}
.button4 {font-size: 20px;}
.button5 {font-size: 24px;}
استخدم خاصية padding لتغيير مساحة الزر:

.button1 {padding: 10px 24px;}
.button2 {padding: 12px 28px;}
.button3 {padding: 14px 40px;}
.button4 {padding: 32px 16px;}
.button5 {padding: 16px;}
أزرار مدورة

استخدم خاصية border-radius لإضافة زوايا مستديرة إلى الزر:
.button1 {border-radius: 2px;}
.button2 {border-radius: 4px;}
.button3 {border-radius: 8px;}
.button4 {border-radius: 12px;}
.button5 {border-radius: 50%;}
حدود الأزرار الملونة

استخدم خاصية border لإضافة حد ملون إلى زر:
.button1 {
  background-color: white;
  color: black;
  border: 2px solid #04AA6D; /* Green */
}
...
أزرار قابلة للتفاعل Hoverable Buttons
استخدم موحد :hover لتغيير نمط الزر عند تحريك الماوس فوقه.
نصيحة: استخدم خاصية transition-duration لتحديد سرعة تأثير “التمرير” (hover).
.button {
  transition-duration: 0.4s;
}

.button:hover {
  background-color: #04AA6D; /* Green */
  color: white;
}
...
أزرار الظل

استخدم خاصية box-shadow لإضافة ظلال إلى زر:
.button1 {
  box-shadow: 0 8px 16px 0 rgba(0,0,0,0.2), 0 6px 20px 0 rgba(0,0,0,0.19);
}

.button2:hover {
  box-shadow: 0 12px 16px 0 rgba(0,0,0,0.24), 0 17px 50px 0 rgba(0,0,0,0.19);
}
أزرار معطلة

استخدم خاصية عتمة (opacity) لإضافة شفافية إلى الزر (يخلق مظهر “معطل”).
نصيحة: يمكنك أيضًا إضافة خاصية المؤشر (cursor) بقيمة “غير مسموح” (not-allowed)، والتي ستعرض علامة “ممنوع الوقوف” عند تحريك الماوس فوق الزر.
.disabled {
  opacity: 0.6;
  cursor: not-allowed;
}
عرض الزر
في الوضع الافتراضي، يتم تحديد حجم الزر من خلال محتواه النصي (بمعنى عرضه يساوي عرض المحتوى). استخدم خاصية العرض (width) لتغيير عرض الزر:

.button1 {width: 250px;}
.button2 {width: 50%;}
.button3 {width: 100%;}
مجموعات الأزرار
قم بإزالة الهوامش وأضف float:left إلى كل زر لإنشاء مجموعة أزرار:

.button {
  float: left;
  border: 1px solid green;
}
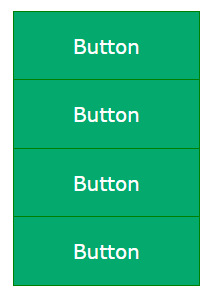
مجموعة الأزرار العمودية

استخدم Display:block بدلاً من float:left لتجميع الأزرار أسفل بعضها البعض، بدلاً من وضعها جنبًا إلى جنب:
.button {
  display: block;
}
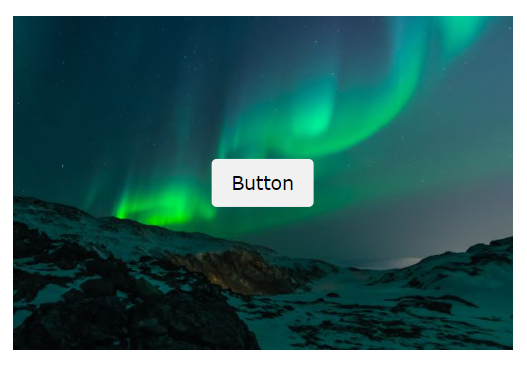
زر على الصورة

<!DOCTYPE html>
<html>
<head>
<style>
.container {
  position: relative;
  width: 100%;
  max-width: 400px;
}

.container img {
  width: 100%;
  height: auto;
}

.container .btn {
  position: absolute;
  top: 50%;
  left: 50%;
  transform: translate(-50%, -50%);
  -ms-transform: translate(-50%, -50%);
  background-color: #f1f1f1;
  color: black;
  font-size: 16px;
  padding: 16px 30px;
  border: none;
  cursor: pointer;
  border-radius: 5px;
  text-align: center;
}

.container .btn:hover {
  background-color: black;
  color: white;
}
</style>
</head>
<body>

<h2>Button on Image</h2>

<p>Add a button on an image:</p>

<div class="container">
  <img src="img_lights.jpg" alt="Snow" style="width:100%">
  <button class="btn">Button</button>
</div>

</body>
</html>
أزرار متحركة
إضافة سهم عند التمرير:
<!DOCTYPE html>
<html>
<head>
<style>
.button {
  display: inline-block;
  border-radius: 4px;
  background-color: #f4511e;
  border: none;
  color: #FFFFFF;
  text-align: center;
  font-size: 28px;
  padding: 20px;
  width: 200px;
  transition: all 0.5s;
  cursor: pointer;
  margin: 5px;
}

.button span {
  cursor: pointer;
  display: inline-block;
  position: relative;
  transition: 0.5s;
}

.button span:after {
  content: '\00bb';
  position: absolute;
  opacity: 0;
  top: 0;
  right: -20px;
  transition: 0.5s;
}

.button:hover span {
  padding-right: 25px;
}

.button:hover span:after {
  opacity: 1;
  right: 0;
}
</style>
</head>
<body>

<h2>Animated Button</h2>

<button class="button" style="vertical-align:middle"><span>Hover </span></button>

</body>
</html>
إضافة تأثير “pressed” عند النقر:
<!DOCTYPE html>
<html>
<head>
<style>
.button {
  display: inline-block;
  padding: 15px 25px;
  font-size: 24px;
  cursor: pointer;
  text-align: center;
  text-decoration: none;
  outline: none;
  color: #fff;
  background-color: #04AA6D;
  border: none;
  border-radius: 15px;
  box-shadow: 0 9px #999;
}

.button:hover {background-color: #3e8e41}

.button:active {
  background-color: #3e8e41;
  box-shadow: 0 5px #666;
  transform: translateY(4px);
}
</style>
</head>
<body>

<h2>Animated Button - "Pressed Effect"</h2>

<button class="button">Click Me</button>

</body>
</html>
إضافة تأثير “ripple” عند النقر:
<!DOCTYPE html>
<html>
<head>
<style>
.button {
  position: relative;
  background-color: #04AA6D;
  border: none;
  font-size: 28px;
  color: #FFFFFF;
  padding: 20px;
  width: 200px;
  text-align: center;
  transition-duration: 0.4s;
  text-decoration: none;
  overflow: hidden;
  cursor: pointer;
}

.button:after {
  content: "";
  background: #f1f1f1;
  display: block;
  position: absolute;
  padding-top: 300%;
  padding-left: 350%;
  margin-left: -20px !important;
  margin-top: -120%;
  opacity: 0;
  transition: all 0.8s
}

.button:active:after {
  padding: 0;
  margin: 0;
  opacity: 1;
  transition: 0s
}
</style>
</head>
<body>

<h2>Animated Button - Ripple Effect</h2>

<button class="button">Click Me</button>

</body>
</html>

